【CentOS8】MariaDBをブチ込む
最近の週末は自宅に閉じこもってゲームばかりしているせいか、毎週月曜日には雪の減り具合にはびっくりする。
しかも、FF7。結構プレイ時間長いのに全然進まんぞ。
この調子でいたらあっという間に雪がなくなってしまいそうだ。
ゲームばかりしていられないなぁ…。睡眠時間を削るしか選択肢がないか…。
さて~今回は。
先週から引き続きCentOSネタ。
やはりデータベースが必要だろう、とのことでMariaDBをインスコする。
ま、テスト用だからテキトーだがね。覚書としてな。
んでは早速。
バージョンの確認
まずはバージョンの確認。
[root@localhost ~]# dnf info mariadb
メタデータの期限切れの最終確認: 0:37:27 時間前の 2020年03月15日 22時02分54秒 に実施しました。
利用可能なパッケージ
名前         : mariadb
エポック     : 3
バージョン   : 10.3.17
リリース     : 1.module_el8.1.0+257+48736ea6
Arch         : x86_64
サイズ       : 6.1 M
ソース       : mariadb-10.3.17-1.module_el8.1.0+257+48736ea6.src.rpm
リポジトリー : AppStream
概要         : A very fast and robust SQL database server
URL          : http://mariadb.org
ライセンス   : GPLv2 with exceptions and LGPLv2 and BSD
説明         : MariaDB is a community developed branch of MySQL - a multi-user, multi-threaded
             : SQL database server. It is a client/server implementation consisting of
             : a server daemon (mysqld) and many different client programs and libraries.
             : The base package contains the standard MariaDB/MySQL client programs and
             : generic MySQL files.
利用できる最新は10.3のようなのでこのままインストールする。
後にレポジトリを追加すれば10.4を利用できることが分かったが、面倒なのでとりあえずこれでヨシとする。
インストール
[root@localhost ~]# dnf install @mariadb:10.3
CentOS-8 - AppStream                            837  B/s | 4.3 kB     00:05
CentOS-8 - Base                                 7.3 kB/s | 3.8 kB     00:00
CentOS-8 - Extras                               3.0 kB/s | 1.5 kB     00:00
Extra Packages for Enterprise Linux 8 - x86_64  3.8 kB/s | 8.2 kB     00:02
Remi's Modular repository for Enterprise Linux  1.1 kB/s | 3.5 kB     00:03
Safe Remi's RPM repository for Enterprise Linux 1.6 kB/s | 3.0 kB     00:01
依存関係が解決しました。
================================================================================
 パッケージ                 Arch   バージョン                   Repo      サイズ
================================================================================
group/moduleパッケージをインストール:
 ・
 略
 ・
ダウンロードサイズの合計: 44 M
インストール済みのサイズ: 209 M
これでよろしいですか? [y/N]:
迷わず「y」。
パッケージのダウンロード:
(1/55): mariadb-common-10.3.17-1.module_el8.1.0 201 kB/s |  62 kB     00:00
(2/55): mariadb-connector-c-3.0.7-1.el8.x86_64. 1.7 MB/s | 148 kB     00:00
(3/55): mariadb-connector-c-config-3.0.7-1.el8. 390 kB/s |  13 kB     00:00
(4/55): mariadb-errmsg-10.3.17-1.module_el8.1.0 2.2 MB/s | 232 kB     00:00
(5/55): mariadb-gssapi-server-10.3.17-1.module_ 692 kB/s |  49 kB     00:00
(6/55): mariadb-backup-10.3.17-1.module_el8.1.0 525 kB/s | 6.0 MB     00:11
(7/55): mariadb-10.3.17-1.module_el8.1.0+257+48 449 kB/s | 6.1 MB     00:13
(8/55): perl-DBD-MySQL-4.046-3.module_el8.1.0+2 574 kB/s | 156 kB     00:00
(9/55): perl-DBI-1.641-3.module_el8.1.0+199+8f0 616 kB/s | 740 kB     00:01
(10/55): perl-Digest-1.17-395.el8.noarch.rpm    397 kB/s |  27 kB     00:00
(11/55): mariadb-server-utils-10.3.17-1.module_ 445 kB/s | 1.6 MB     00:03
(12/55): perl-Digest-MD5-2.55-396.el8.x86_64.rp 258 kB/s |  37 kB     00:00
(13/55): perl-IO-Socket-IP-0.39-5.el8.noarch.rp 419 kB/s |  47 kB     00:00
・
・
略
・
・
  perl-Unicode-Normalize-1.25-396.el8.x86_64
  perl-constant-1.33-396.el8.noarch
  perl-interpreter-4:5.26.3-416.el8.x86_64
  perl-libs-4:5.26.3-416.el8.x86_64
  perl-macros-4:5.26.3-416.el8.x86_64
  perl-parent-1:0.237-1.el8.noarch
  perl-podlators-4.11-1.el8.noarch
  perl-threads-1:2.21-2.el8.x86_64
  perl-threads-shared-1.58-2.el8.x86_64
  psmisc-23.1-3.el8.x86_64

完了しました!
んん。とりあえずOK。
自動起動の設定と起動
[root@localhost ~]# systemctl enable mariadb
Created symlink /etc/systemd/system/mysql.service → /usr/lib/systemd/system/mariadb.service.
Created symlink /etc/systemd/system/mysqld.service → /usr/lib/systemd/system/mariadb.service.
Created symlink /etc/systemd/system/multi-user.target.wants/mariadb.service → /usr/lib/systemd/system/mariadb.service.
OK。
[root@localhost ~]# systemctl start mariadbOK。
セキュアインストール
[root@localhost ~]# mysql_secure_installation

NOTE: RUNNING ALL PARTS OF THIS SCRIPT IS RECOMMENDED FOR ALL MariaDB
      SERVERS IN PRODUCTION USE!  PLEASE READ EACH STEP CAREFULLY!

In order to log into MariaDB to secure it, we'll need the current
password for the root user.  If you've just installed MariaDB, and
you haven't set the root password yet, the password will be blank,
so you should just press enter here.

Enter current password for root (enter for none):
OK, successfully used password, moving on...

Setting the root password ensures that nobody can log into the MariaDB
root user without the proper authorisation.

Set root password? [Y/n] Y
New password:
Re-enter new password:
Password updated successfully!
Reloading privilege tables..
 ... Success!

By default, a MariaDB installation has an anonymous user, allowing anyone
to log into MariaDB without having to have a user account created for
them.  This is intended only for testing, and to make the installation
go a bit smoother.  You should remove them before moving into a
production environment.

Remove anonymous users? [Y/n] Y
 ... Success!

Normally, root should only be allowed to connect from 'localhost'.  This
ensures that someone cannot guess at the root password from the network.

Disallow root login remotely? [Y/n] Y
 ... Success!

By default, MariaDB comes with a database named 'test' that anyone can
access.  This is also intended only for testing, and should be removed
before moving into a production environment.

Remove test database and access to it? [Y/n] Y
 - Dropping test database...
 ... Success!
 - Removing privileges on test database...
 ... Success!

Reloading the privilege tables will ensure that all changes made so far
will take effect immediately.

Reload privilege tables now? [Y/n] Y
 ... Success!

Cleaning up...

All done!  If you've completed all of the above steps, your MariaDB
installation should now be secure.

Thanks for using MariaDB!
「Thanks for」が出たら完了。
なにやらいろいろと聞いてきますが、環境に合わせて選択する。
とりあえずMariaDBにログイン
[root@localhost ~]# mysql -uroot -p
Enter password:
Welcome to the MariaDB monitor.  Commands end with ; or \g.
Your MariaDB connection id is 18
Server version: 10.3.17-MariaDB MariaDB Server

Copyright (c) 2000, 2018, Oracle, MariaDB Corporation Ab and others.

Type 'help;' or '\h' for help. Type '\c' to clear the current input statement.ンウェルカンム。
OKすね。
文字コード変更
忘れてた。これやっとかないと文字化けするんだった。
設定ファイルを追加。
[root@localhost my.cnf.d]# vi /etc/my.cnf.d/server.cnfこの内容で保存。
[mysqld]
character-set-server=utf8
データベースを再起動。
[root@localhost my.cnf.d]# systemctl restart mariadb他にも細かい設定があった気がするのだが…
パッと思い出せないので、使いながら変だったら設定を変えていこう。
テスト用データベース作成
これからいろいろ試されるべくデータベースを作成。
MariaDB [(none)]> create database test_database;
Query OK, 1 row affected (0.107 sec)test_databaseという名前で作成。
OK。
MariaDBユーザ作成
今回はとりあえず検証環境なので、フル権限ユーザを作成。
ユーザとデータベースがセットになっているので、データベースを作成した後に。
MariaDB [(none)]> GRANT ALL PRIVILEGES ON `test_database`.* TO 'dbmanager'@'localhost'  IDENTIFIED BY 'hogepass';
Query OK, 0 rows affected (0.157 sec)
クライアントからの接続確認
今回はMk-2で確認。
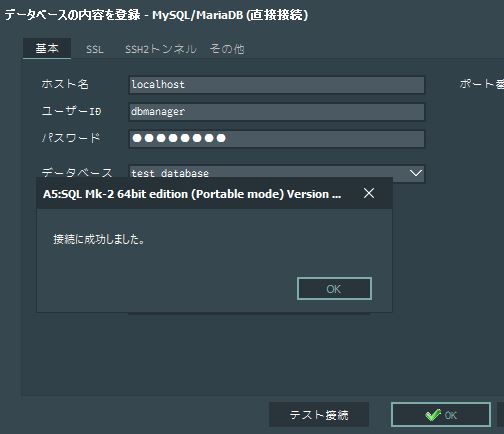
接続に成功しました、とさ。
phpMyAdminを入れてもいいのだが、別に不要かと。
あまり変なUIを入れるとセキュリティ的にもあまり、な感じなんで。
うんうん。これでデータベースの検証も可能になるな。
あとは~…。PHPのフレームワークとか…。